Blog
Unexpected Blizzard Conditions
I was reminded again last night how fast weather can change. We are so THANKFUL to have made it home safely. My husband, being both a farmer & a pilot is constantly & obsessively checking the weather. No evidence of bad weather had appeared when we headed out earlier in the day. The drive home was good until we were 12 miles from home. Snow started & soon it was fast & heavy with forceful strong winds that could easily hypnotize a person. Before we knew it, the road was gone. We were down to 10 mph & soon after, 5 mph was our top speed. It was a stark reminder of past blizzards we had heard about. This was the worst I had ever been in. There was zero visibility. The temperature was dropping rapidly & winds were increasing with no signs of improvement. Mick was able to see a ridge of snow the road grader had left in the road out his side window. Even with the snow ridge it was difficult to verify we were on the road. The snow was coming so fast with high winds that created mini tornadoes & smoke-like effects coming off the road. We had to stop briefly a few times, hoping for better visibility. We thought we were on top of a hill near our house, when in fact we weren’t even to it yet. It took us nearly 2 hours to travel the last 10 miles home. We are so grateful we made it home safely. We had a full tank of gas, lots of blankets & warm clothing. We also had a cooler full of food from the grocery store if worst came to worst. I wanted to share this because it reminded me of a book my dad had me on a mission to find years ago. ‘Looking For Candles In The Window’ by Douglas Ramsey & Larry Skroch. It is about a horrible blizzard on Saturday, March 15, 1941. The blizzard came down from Alaska, affected Canada, North Dakota & Minnesota. 71 lives were lost during the blizzard. Many of you across the region will recognize family names in the book. Two children from Hannah, North Dakota died during the blizzard. They were headed home; 2-1/2 miles north of the country school after a 4-H meeting, but were found 1/2 mile south-east of it. I have recently discovered this occurred within a couple miles north-west of our farm. Many people were out shopping, attending basketball games & St. Patrick’s Day parties. Many were found within yards of safety, but their bodies gave way & they had become disoriented from the wind & snow. In Crookston, MN a large window with 12 panes of glass was torn from the Crookston Fibre Manufacturing building, carried 50 feet and set down in frozen ground without breaking a single pane of glass. Deaths occurred to the southeast tip of Minnesota. The book is available here: ![]() amzn.to/2169XZo They have also written about the blizzard of 1966 available here:
amzn.to/2169XZo They have also written about the blizzard of 1966 available here: ![]() amzn.to/1ScTxhEthey are working on a book for the 96-97 blizzards also.
amzn.to/1ScTxhEthey are working on a book for the 96-97 blizzards also.
Painted Floor
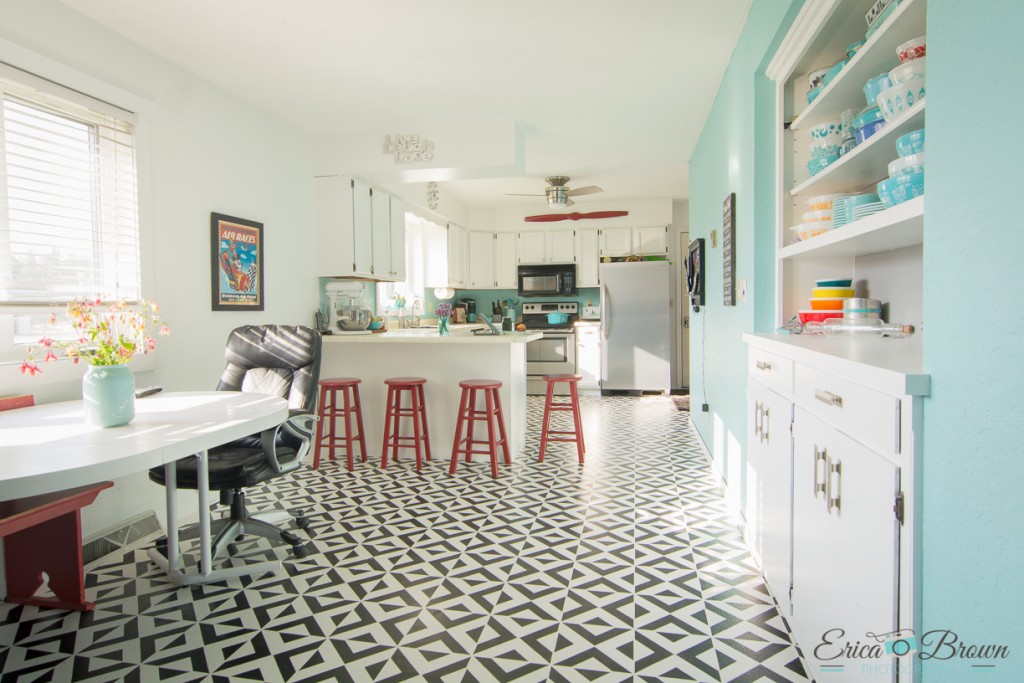
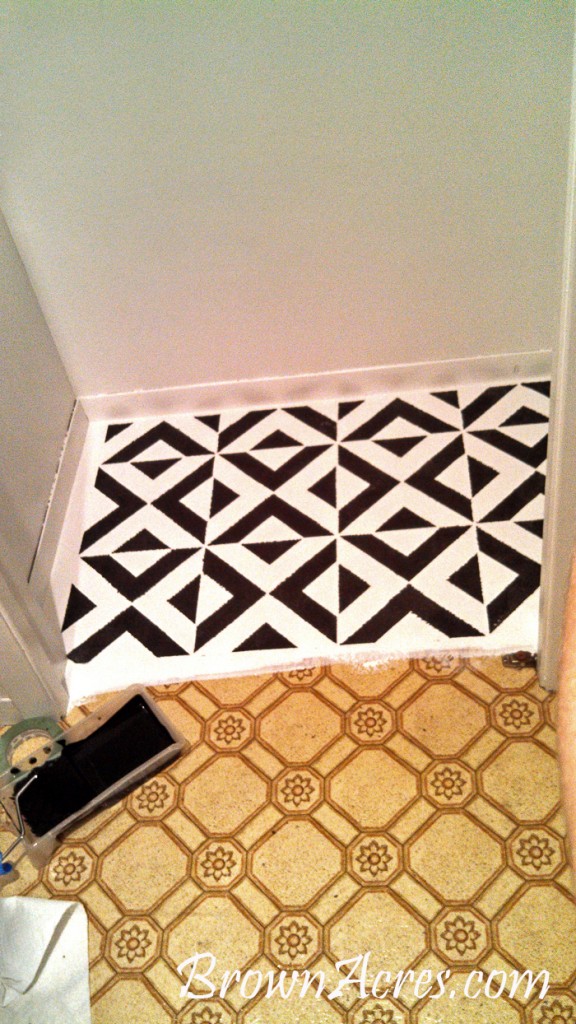
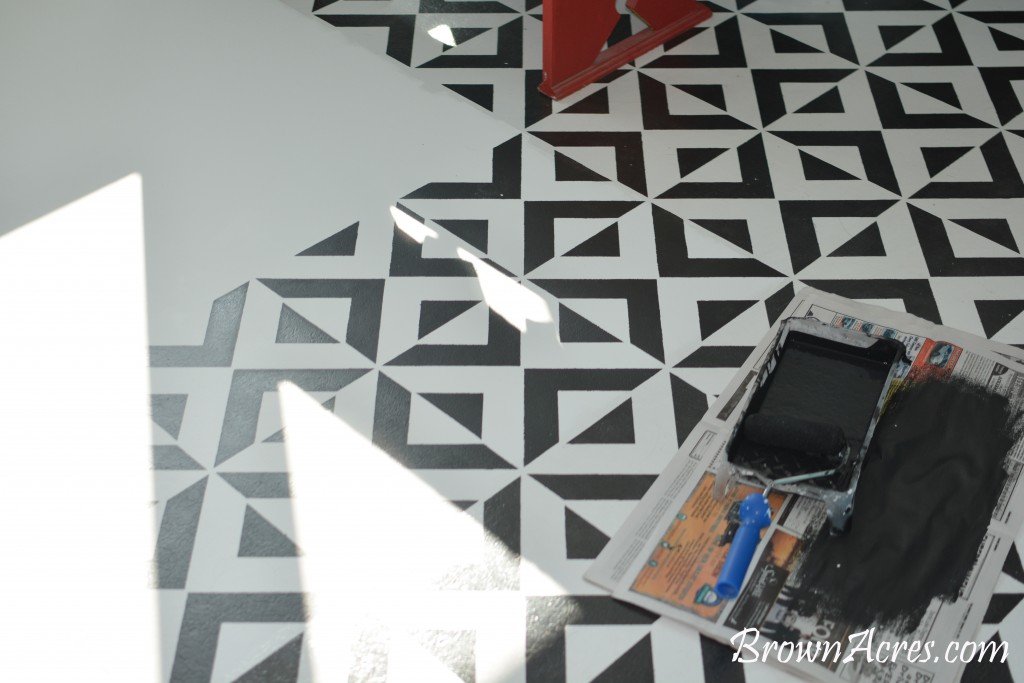
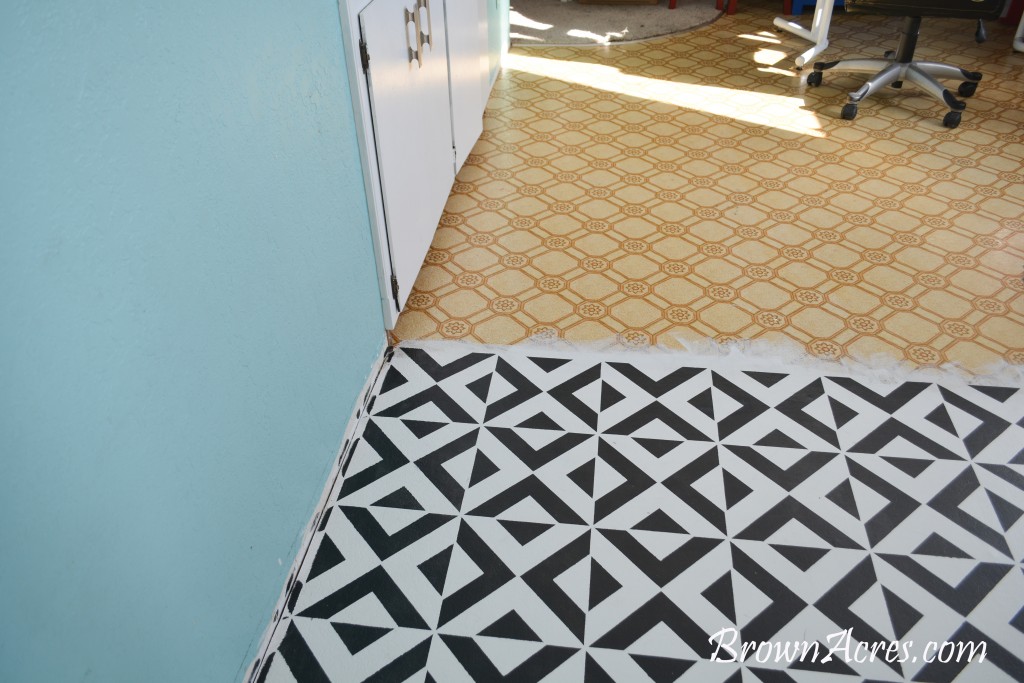
 I painted the outdated vinyl floor in my house! I thought I’d share since I have been asked by several people how I painted it. I bought my stencil from Royal Design Studio, I used the all the angles stencil.
After a lot of research and trial & error I found a budget friendly solution to our 80’s vinyl floor. I painted our vinyl floor for a much needed update! I was able to do our kitchen, laundry & front bathroom for under $300 & some time of course.
Oil based primer
Flat or Matte paint colors – go for high quality here
Polyacrylic – I used Satin & Semi-gloss. I found the semi-gloss too slippery, so my first two coats were semi-gloss & the top coat was satin. Polyacrylic doesn’t yellow the way polyurethane does.
Foam rollers (the extra fine type for cupboards)
Stencil
Paint trays for each color
Paper or newspaper to roll excess paint off
Painters tape
Scrub brush or vegetable scrubber
Simple green or similar cleaner for cleaning dried paint from stencil (see stencil manufacturers recommendation)
 It can be tedious, but when done in chunks goes quick & turns out great! The less you have to go around, the easier it will be. My project was quite difficult due to the cupboards & so many corners & edges. I’m so glad I painted my floor, I could have never found a flooring this unique! It is strong & withstands lots of heavy traffic in my house.


